

Protect C# Web API using Microsoft Entra ID (Azure AD)
Protect C# Web API using Microsoft Entra ID (Azure AD)
Hi All,
In this simple post, I would like to explain how I went about securing a C# Web API using Microsoft Entra ID (formerly known as Azure AD).
I am going to assume that you know your way around Entra ID and have the necessary permissions to create App Registrations—even better if you have your own testing/sandbox environment to experiment in.
Let’s Get Started
Creating the App Registration
In order to have your Web API work with Entra ID, you first need to create an App Registration.
-
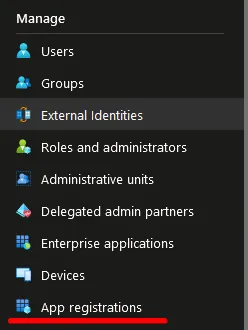
Login to Entra ID and, on the left-hand sidebar, select “App Registrations”.
-
Click on “New Registration” in the top navbar.

-
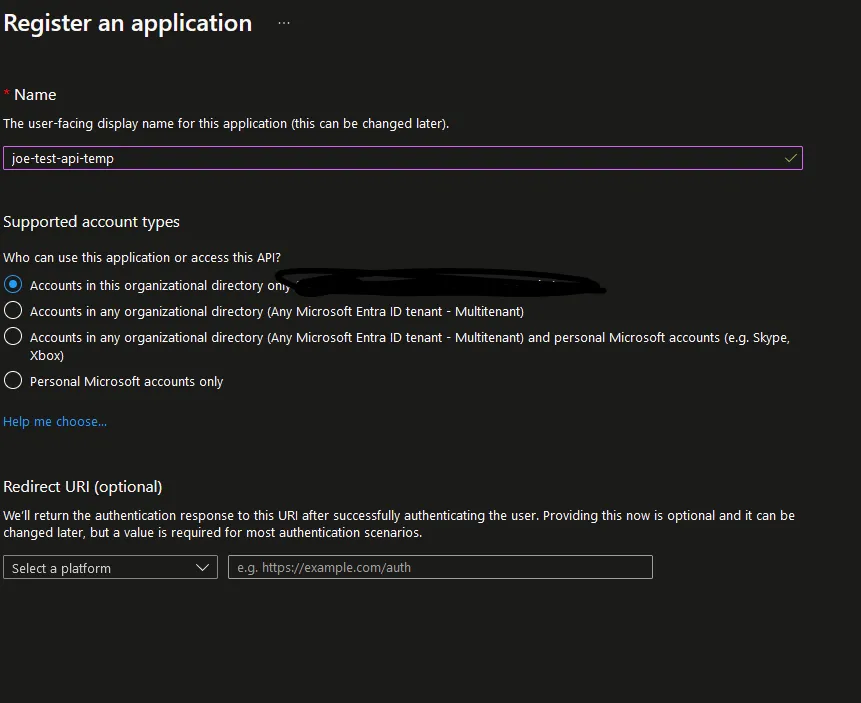
Fill out the form:
- Provide a name for the App Registration. This can be anything meaningful to you or your organization.
- Leave the rest of the settings as they are, as shown below.
-
Click the blue “Register” button at the bottom.
App Registration Overview Page
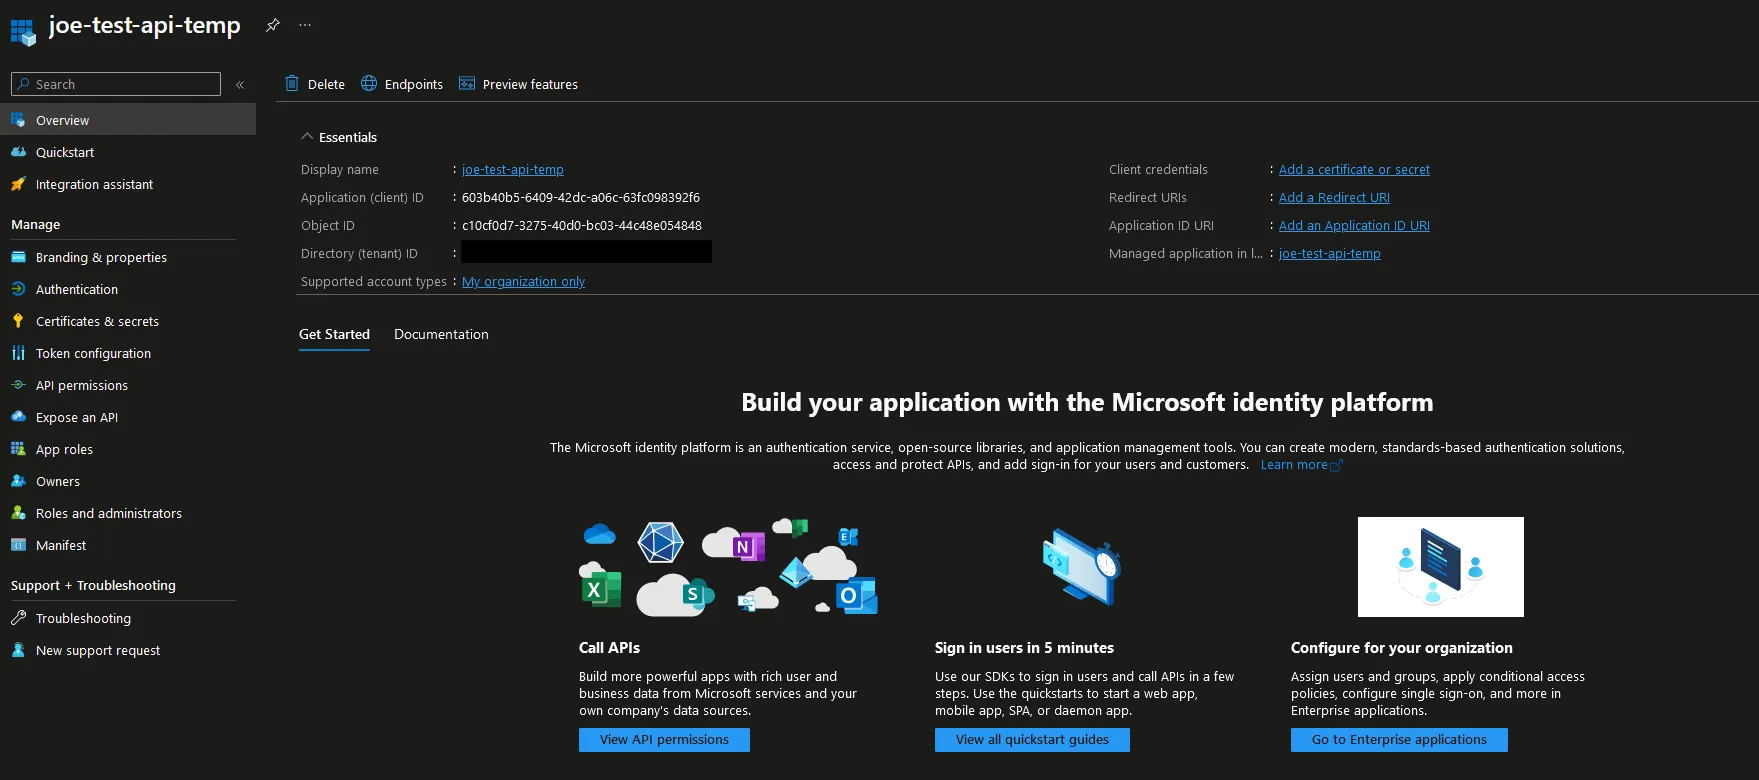
After clicking Register, you will be presented with the App Overview Page.
Expose an API
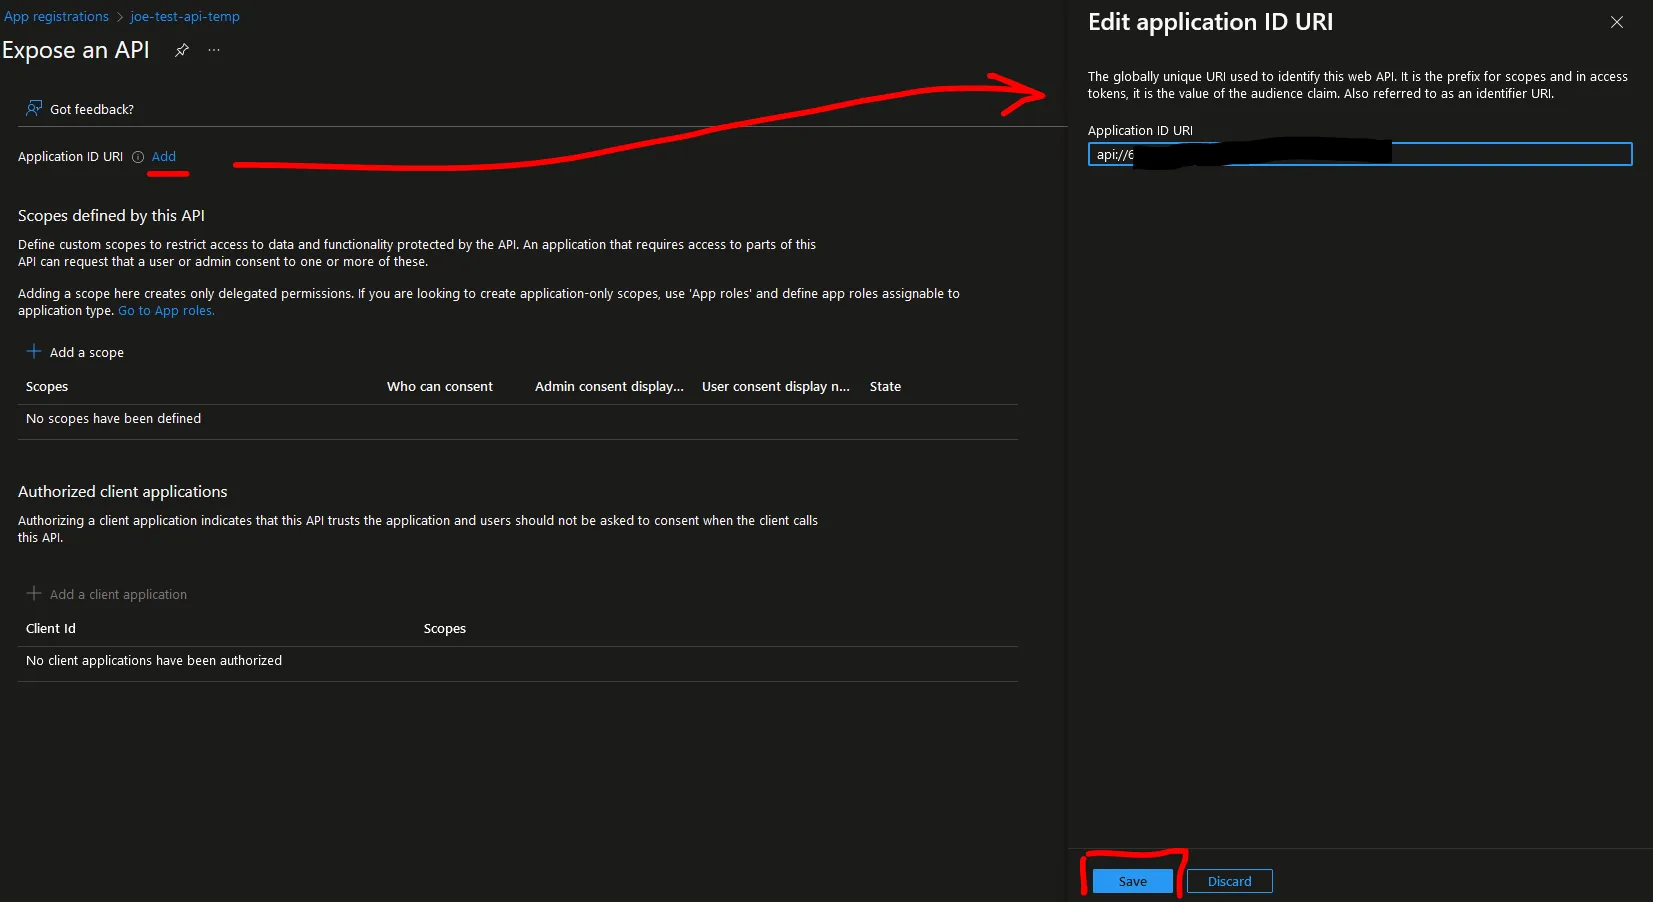
Now we need to expose the Web API.
-
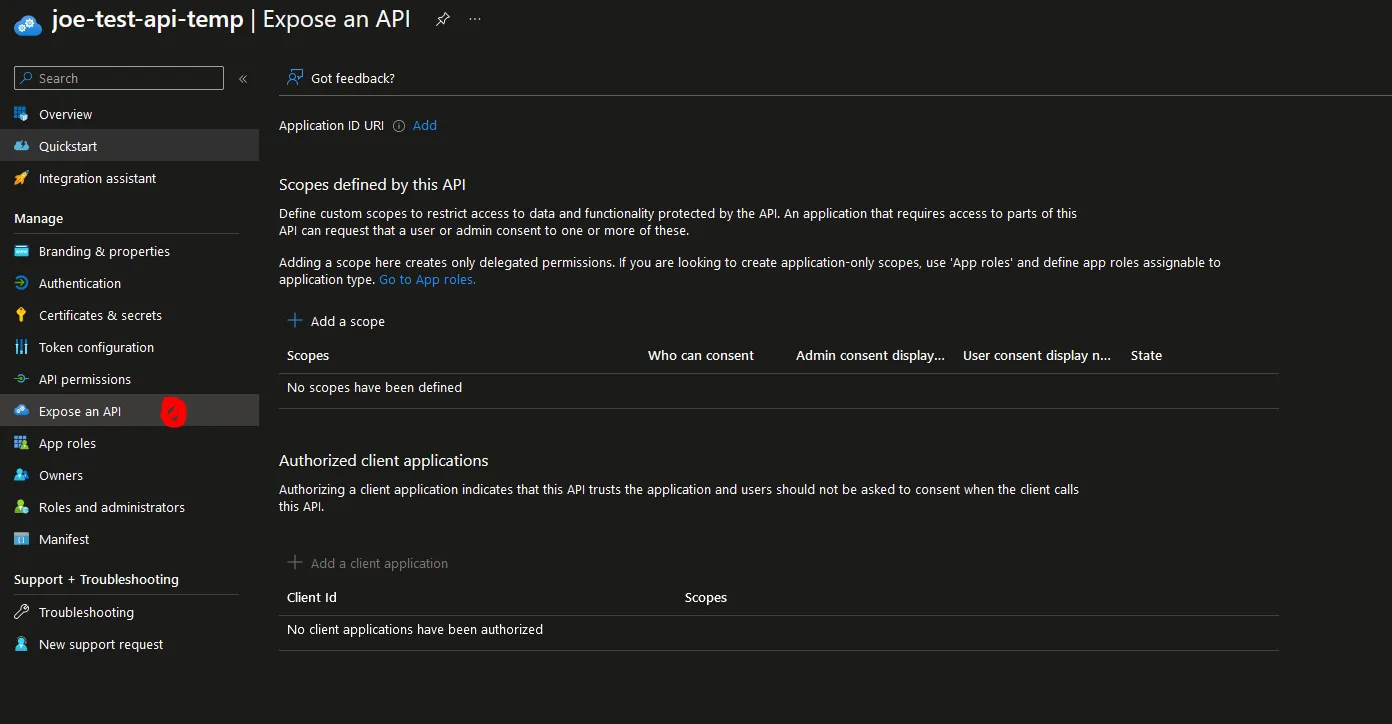
On the sidebar, click on “Expose an API”.
-
Click on the “Add” button next to “Application ID URI”.
-
Leave the default generated GUID and click the blue “Save” button.
Adding Scope
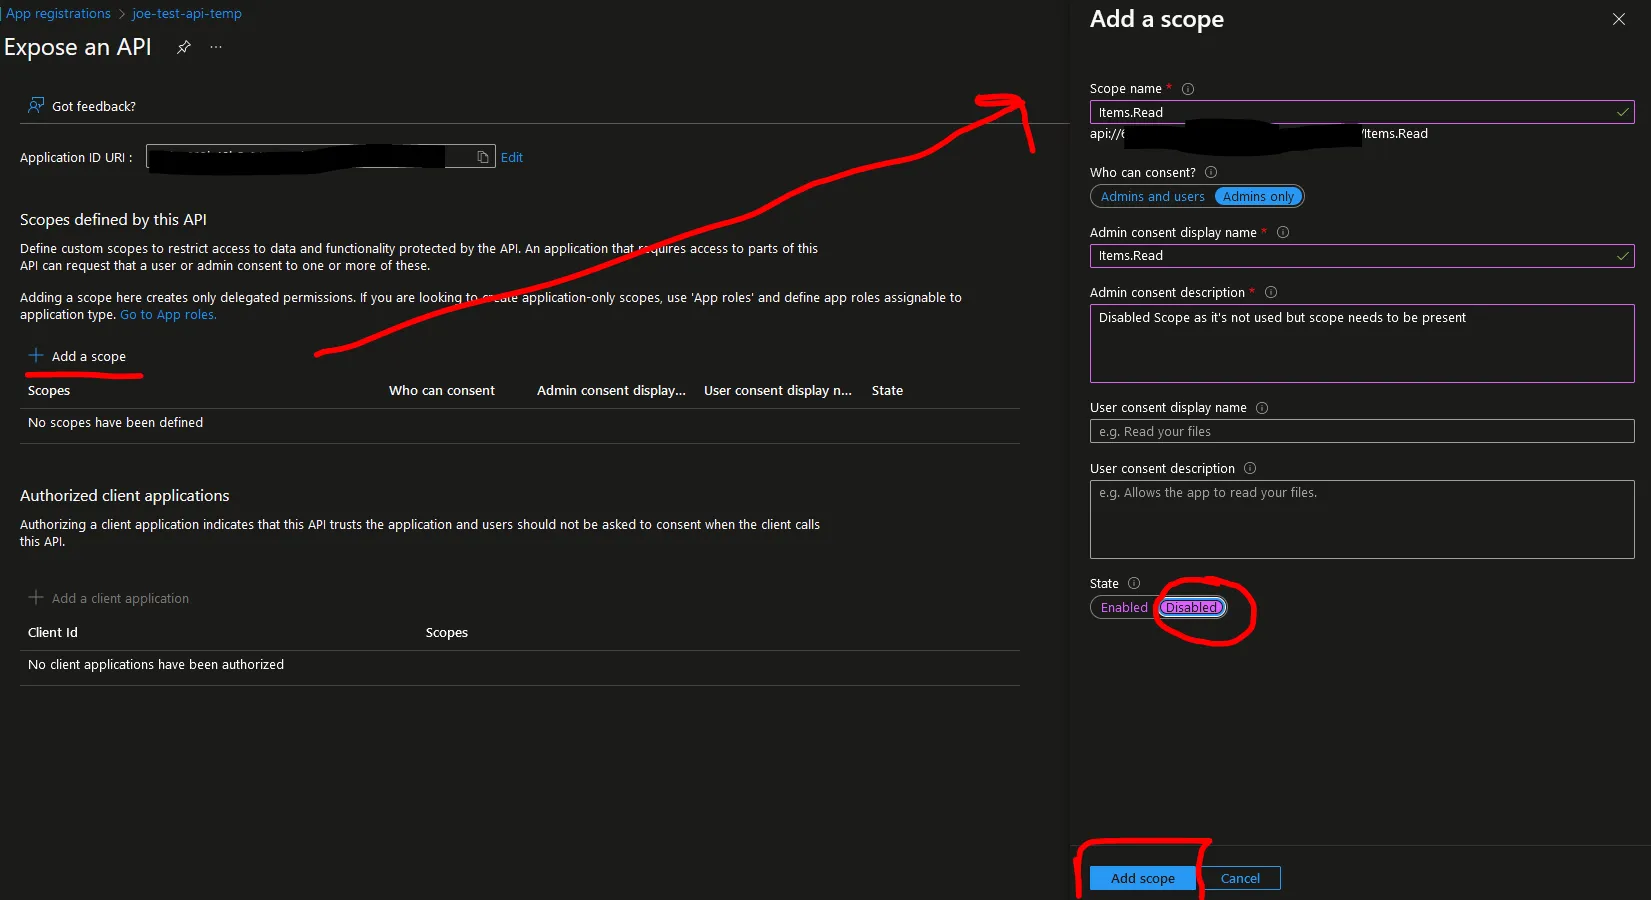
Next, we need to add a scope. We will not be using scopes in this Web API example, but at least one scope needs to be present—even if it’s not used.
-
I’ve named the scope “Items.Read”, and its state is disabled.
-
Click the “Add Scope” button.
Configuring Secrets
Now, let’s create a Client Secret so we can use Postman to test the protected API and obtain an OAuth 2.0 Token.
-
Click “Client Secret” and then “Add”.

-
Important! Copy the auto-generated secret value and store it somewhere safe. It will only be shown once, and you will need it later.
Configure Authentication
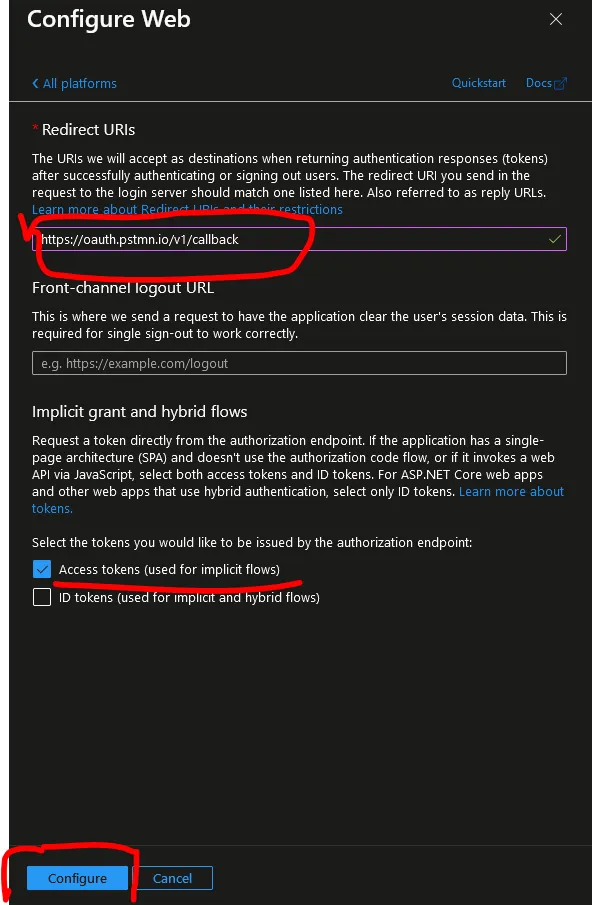
Next, we need to configure authentication so that Postman can get an Access Token.
-
Select the Web platform.

-
Paste in the Postman Callback URI: https://oauth.pstmn.io/v1/callback
-
Click the “Configure” button.
App Roles
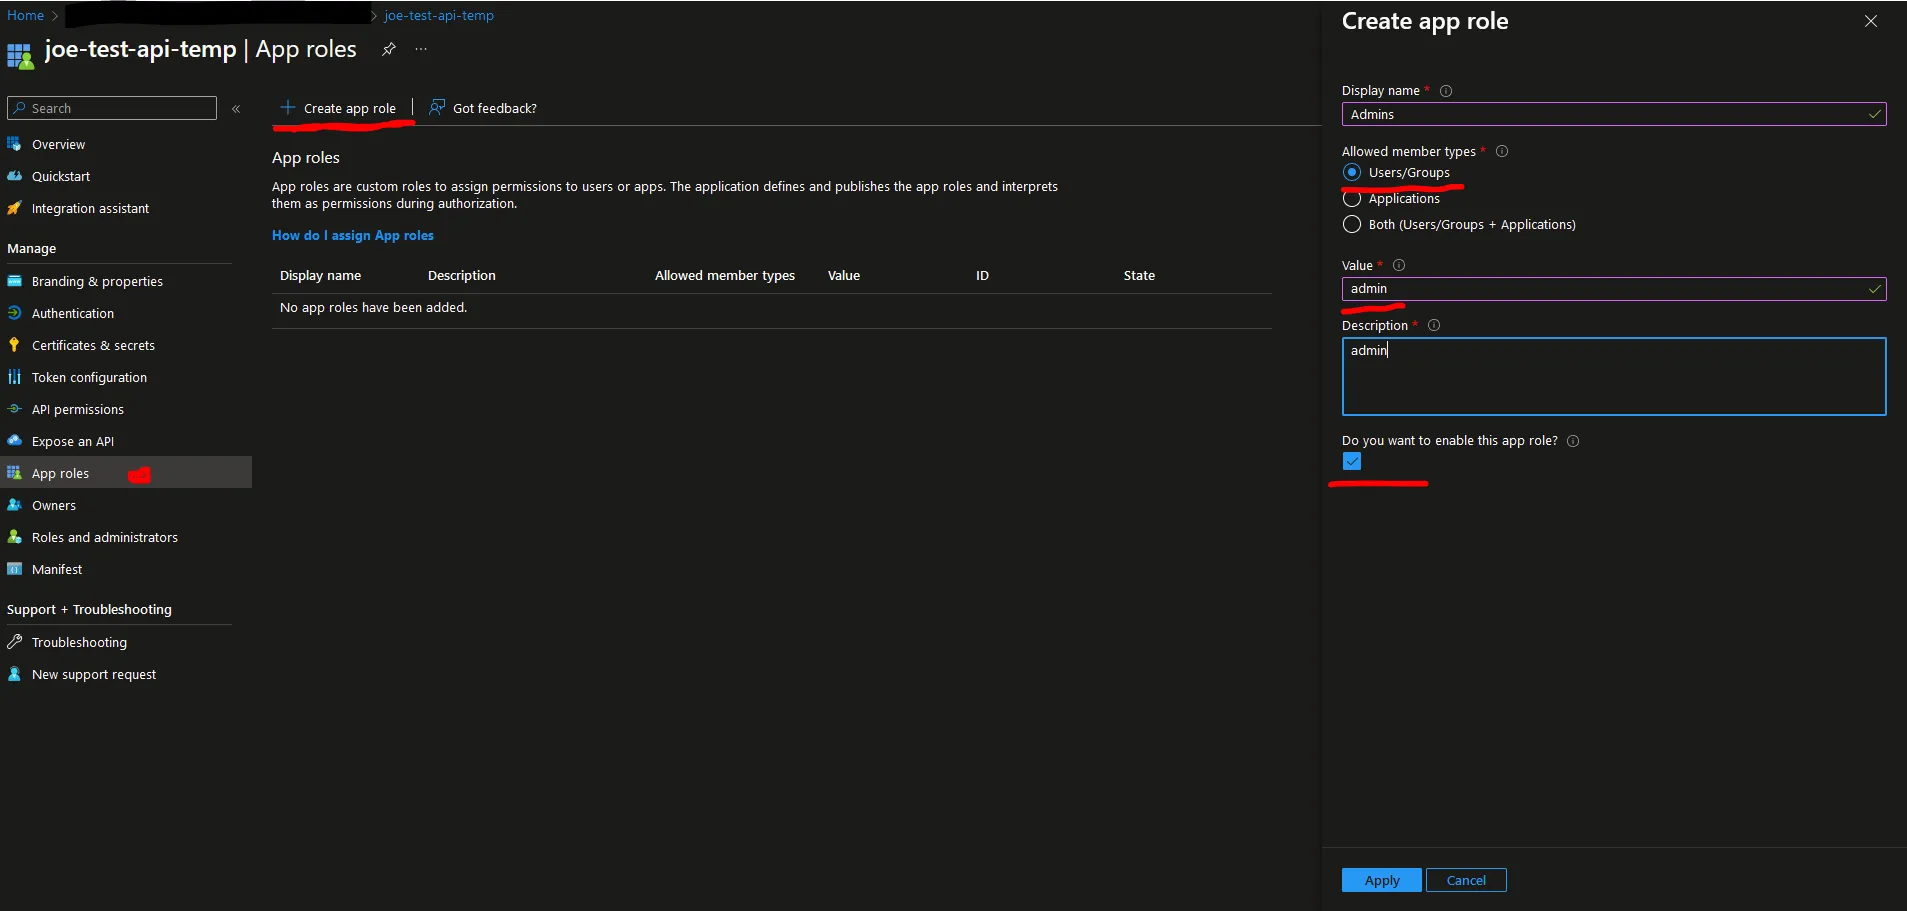
Now, we need to configure App Roles.
- Click “Apply” to add the role.
Assigning Users to the Role
- Go back to the Entra ID welcome screen and select “Enterprise Applications” from the left-hand sidebar.
- Locate the App Registration you created earlier.
- Select “Users and Groups”.

- Add a user or group. After adding a user, you will see the “Admin” role created earlier.
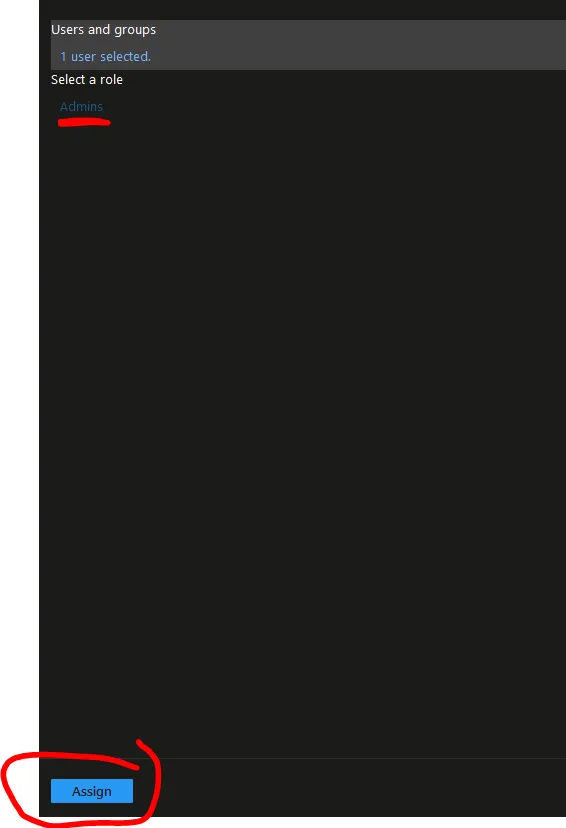
- Click “Apply”, and we are now ready to move onto the Postman section.
Configuring Postman
I assume you’re already familiar with Postman.
- You will need to create a new collection and add a request to that collection.
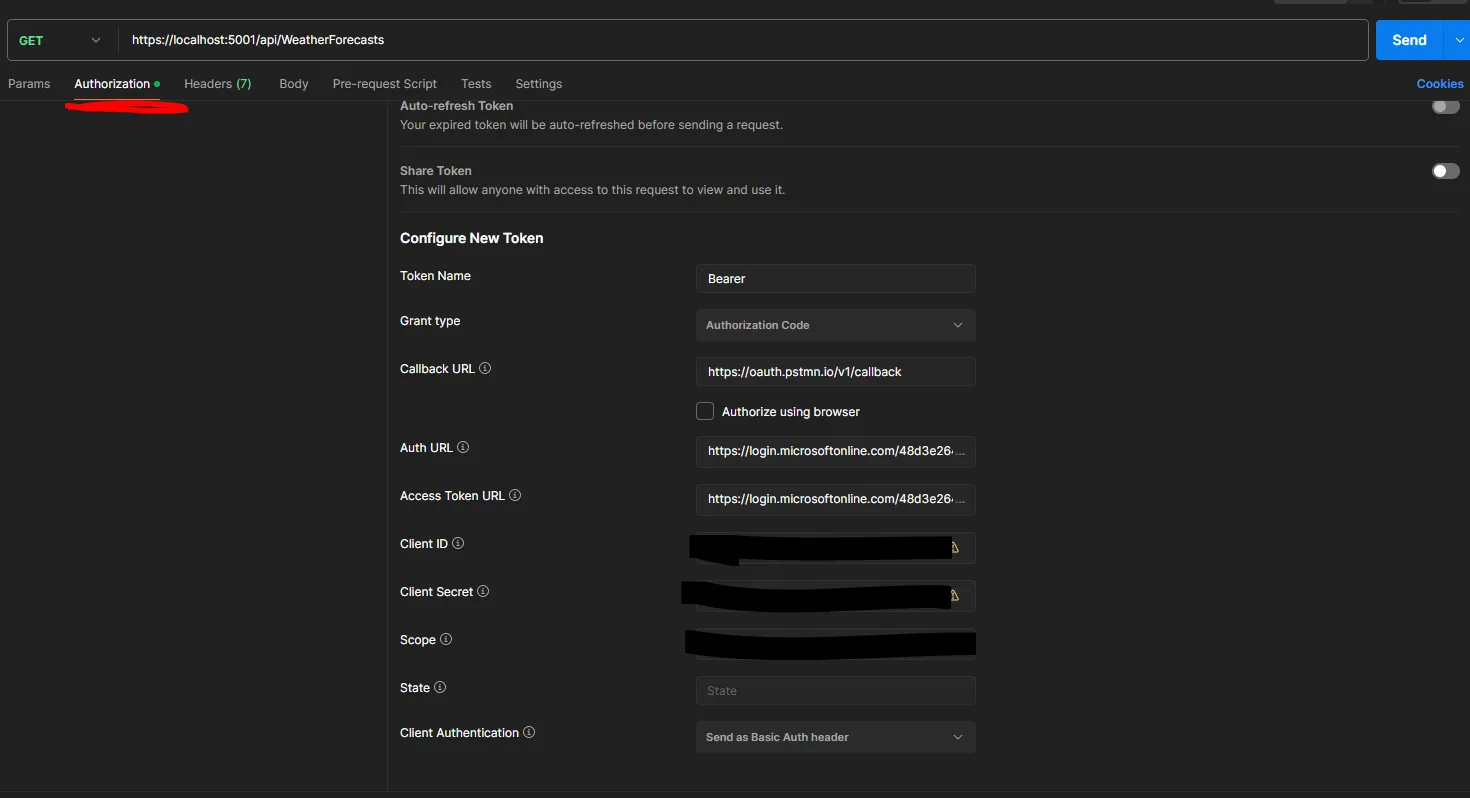
- The necessary values can all be found in the App Registrations page for the API.
C# Code
Now, let’s configure the C# Web API.
-
I have used Visual Studio to create a minimal API template based on Microsoft’s Weather Forecast API.
-
You will need to add the NuGet package: Microsoft.Identity.Web
-
In Program.cs, you will need to add the following code:
using Microsoft.Identity.Web;
var builder = WebApplication.CreateBuilder(args);
builder.Services.AddMicrosoftIdentityWebApiAuthentication(builder.Configuration, "AzureAd");builder.Services.AddAuthorization(options =>{    options.AddPolicy("admin", policy => policy.RequireRole("admin"));
});
var app = builder.Build();
app.UseAuthentication();
app.Run();
app.MapGet("/weatherforecast", () =>{    var forecast = Enumerable.Range(1, 5).Select(index =>        new WeatherForecast        (            DateOnly.FromDateTime(DateTime.Now.AddDays(index)),            Random.Shared.Next(-20, 55),            summaries[Random.Shared.Next(summaries.Length)]        ))        .ToArray();    return forecast;}) .RequireAuthorization("admin").WithName("GetWeatherForecast").WithOpenApi();
This concludes the setup! You now have a secure C# Web API using Microsoft Entra ID (Azure AD). 🚀
← Back to blog